Some of the most impressive effects in video — a subject walking behind text, a split-screen that feels spatial, cloning yourself in the same shot — are easier to pull off in CapCut than most editors realize. The hard part isn’t the concept; it’s knowing which masking tool to reach for and how to pair it with keyframes so the result actually moves the way you intended.
This guide covers CapCut’s linear, mirror, and filmstrip masks and how to use them to build composited shots that hold up on a real timeline.
Prerequisites / What You Need
Before diving into the masking panel, ensure you have the following:
- CapCut Desktop App (Updated to the latest version).
- Two overlapping clips (Ideally shot on a tripod to ensure the background remains identical).
- A clean workspace (Ensure you safely clear your CapCut cache first to prevent timeline stuttering during complex overlays).
Core Step-by-Step Tutorial
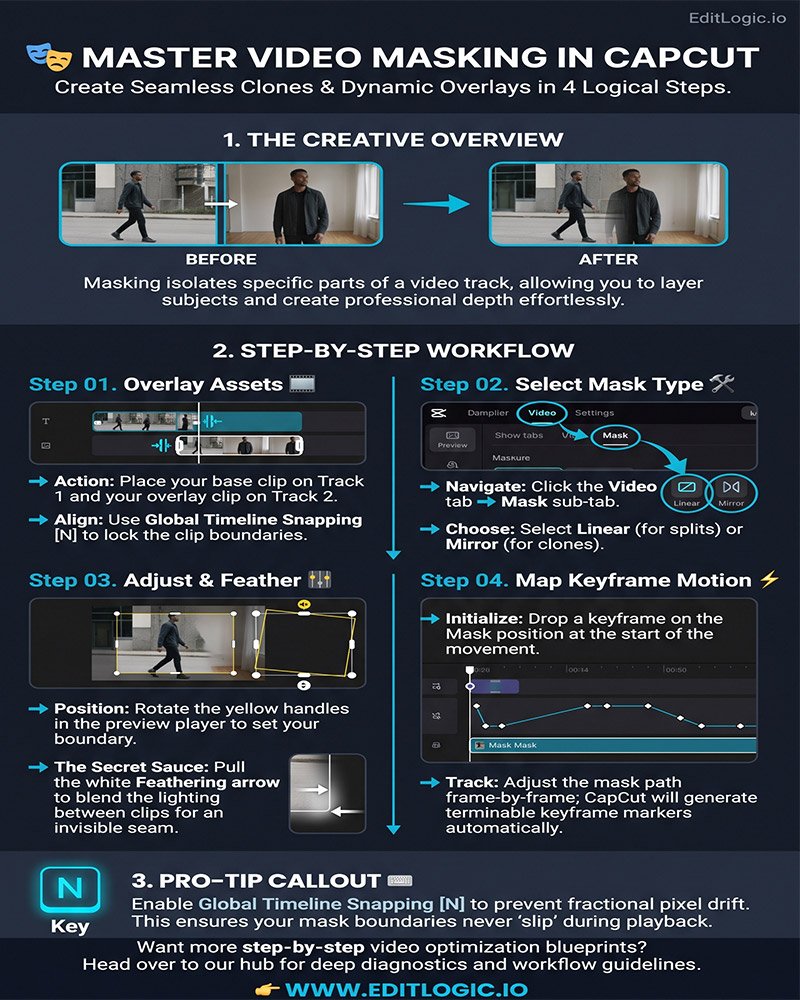
Step 1: Overlay Your Media Assets
Masking requires at least two layers of video to be active on your timeline simultaneously.
- Drag your “Base” clip onto the primary video track.
- Drag your second clip (the “Overlay”) directly above the base clip on a new track.
- Align the two clips so the action happens at the same time on the timeline.
Step 2: Access the Masking Properties
- Left-click on the top video track (the overlay) to highlight it in blue.
- Navigate to the top-right properties panel and select the Video tab, then click on the Mask sub-tab.
- Choose your desired mask shape. For a classic split-screen or clone effect, select Linear or Mirror.
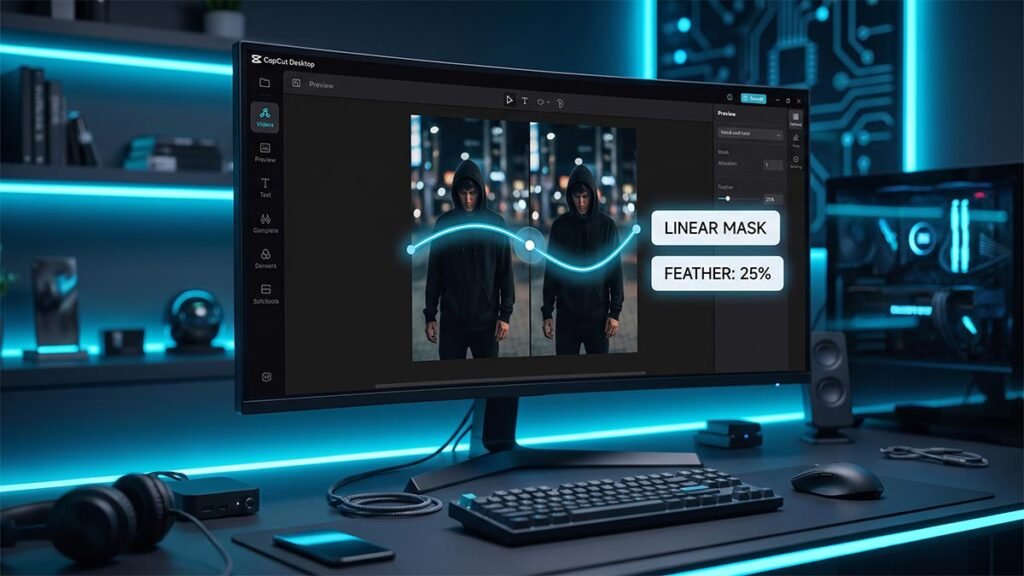
Step 3: Calibrate the Mask Position and Feathering
- Use the yellow handles in the Video Preview Player to rotate or move the mask line until your two subjects are visible in the same frame.
- To make the transition between clips invisible, grab the small white arrow on the mask line and pull it slightly to add Feathering. This softens the edges and blends the lighting between the two shots.
- If your playback begins to drop frames while adjusting the mask, switch your preview quality to Performance Mode.
How to Fix Common Masking Errors
- What to do if the “seam” between clips is visible: This is usually due to lighting shifts. Increase the Feathering slider in the Masking panel or use the color grading workflow to match the exposure of both clips.
- What to do if the mask moves out of place: If your subject moves, you must use Keyframes. Drop a keyframe on the “Mask” position at the start of the movement and adjust the mask line as the subject moves to keep them isolated.
Choose H.264. While HEVC (H.265) offers slightly smaller file sizes, H.264 provides universal compatibility across web browsers, older media players, and social media compression systems. For a deep technical breakdown of how this industry-standard algorithm uses inter-frame prediction to compress data without sacrificing master clarity, you can explore the comprehensive H.264 Video Compression Overview by Apple Developer Documentation.
Pro-Tips for Speed & Efficiency
- The Global Timeline Snapping Trick: When lining up your overlay clips, hit the N key to engage global timeline snapping. This ensures your mask and video boundaries lock perfectly to the frame without fractional drift.
- Invert the Mask: If the wrong side of the video is being hidden, click the Invert button (two arrows icon) in the Masking panel to instantly flip the visibility.
Conclusion
Transitioning away from basic single-track editing to advanced masking elevates the structural rhythm of your content and keeps viewers hooked. Whether you are creating ads or viral social clips, these compositing techniques rescue your workflow from amateur presets. Apply these masking blueprints to your next project to design professional, high-retention layouts effortlessly.
How do I add keyframes to masks for moving subjects?
To track a moving subject with a mask, you must manually map the mask’s path using the properties panel. First, select your clip and apply a mask (e.g., Linear or Circle). Move your timeline playhead to the start of the movement and click the diamond-shaped keyframe icon next to the mask’s position and rotation settings. As your subject moves, advance the playhead and reposition the mask; CapCut will automatically generate new terminal keyframe markers to ensure the mask follows the subject fluidly.
What is the best feathering setting for invisible mask seams?
There is no single “correct” numeric value, as feathering depends on the lighting consistency between your clips. To achieve a seamless blend, grab the small white arrow (feathering handle) extending from your mask line in the preview player and pull it slightly outward. This softens the edge of the mask, creating a gradient that hides the harsh “seam” between overlays. If the seam remains visible due to lighting shifts, you should match the exposure using a color grading workflow before finalizing the mask.
Can I use masks to create a walk-behind-text effect?
Yes, masking is the primary method for creating depth and “sandwiching” text between a subject and a background. To do this, duplicate your subject clip and place it on a track above your text layer. Apply a mask (or use the Smart Cutout AI tool for complex shapes) to isolate the subject on the top track. Because the top layer only contains the isolated subject, the text layer underneath will appear to be positioned behind them in 3D space.
What should I do if my mask moves or “slips” during editing?
If your mask or keyframe placements are slipping past your intended markers, you should engage Global Timeline Snapping. By hitting the “N” key on your keyboard, you force your playhead and mask adjustments to lock perfectly onto frame markers and clip boundaries. This prevents fractional pixel drift and ensures your masks remain perfectly aligned with your audio or visual cues.
Does masking affect my computer’s export speed?
Yes, running multiple mask layers and high-resolution overlays can strain your hardware, potentially leading to export freezes at 99%. To ensure a smooth render, you should enable Hardware GPU Acceleration in the Performance settings menu and clear your pre-render cache before hitting export. This flushes out temporary render clutter and allows your graphics card to handle the heavy compositing tasks.