CapCut’s Auto Normalization feature is almost always the cause. It runs a loudness pass at export that ignores the manual volume levels you set on individual tracks, boosting quiet elements — including background music — to meet a target loudness level. The result is a mix that sounded balanced in the preview but has music overpowering everything else in the final file.
Quick Answer
If your background music is too loud only after exporting:
- Your clip volume is probably still near the CapCut default (audio imports at 100%, which is the full source loudness of the file).
- CapCut’s preview and the final export don’t always sound identical — what you hear while editing is not a guaranteed match for the rendered file.
- The platform you upload to (TikTok, YouTube Shorts, Instagram Reels) re-normalizes your audio after upload, which can make an already-loud music bed sound even more aggressive.
The fix touches all three of those layers, not just the volume slider. Let’s go through them one at a time.
Why Music Sounds Fine in CapCut but Too Loud After Export
1. CapCut imports audio at full source volume
CapCut imports audio tracks at 100% by default, which mirrors the full source level of the file. For most commercially mastered music, that is already loud. When you drop that track under a voiceover — especially one recorded on a phone mic — the music almost always overtakes the speech. Nothing is “broken” here. CapCut simply isn’t guessing your intended balance for you; adjusting the slider down is not optional — it is the starting point of every mix.
2. The preview isn’t a perfect mirror of the export
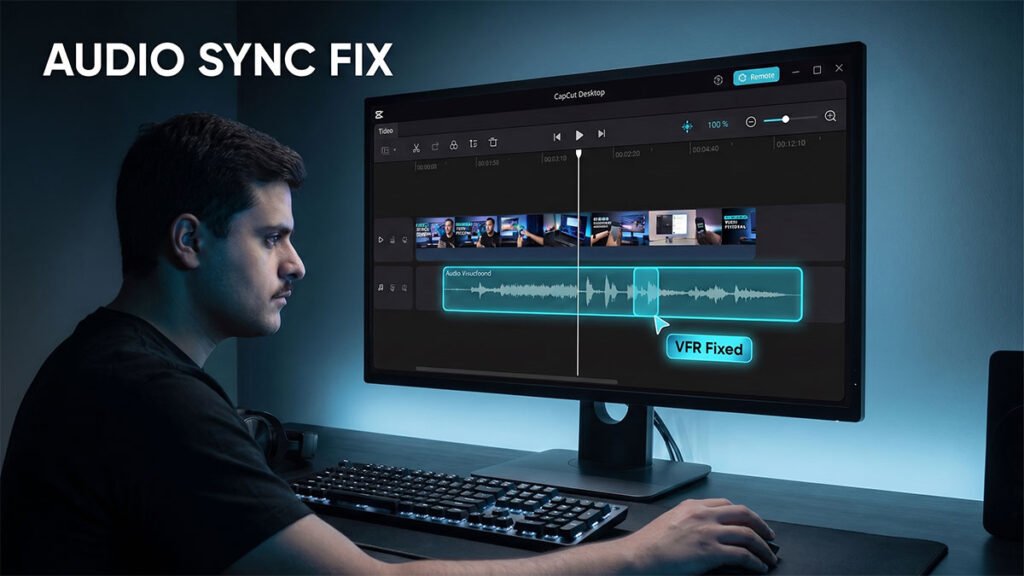
This is the part almost nobody talks about, and it’s the actual root cause for a lot of “it sounded fine until I exported” complaints. CapCut has publicly acknowledged that edits can appear differently in the preview, timeline, or final export compared to what you see while editing, due to rendering glitches, cache errors, software bugs, or device-specific limitations, and this applies across mobile, desktop, and web. On CapCut Web specifically, the editor uses cloud-assisted rendering — what you see is a best-effort approximation, not pixel-perfect WYSIWYG, and mobile previews similarly can shift perceived loudness in ways that the CapCut preview does not always reflect.
Translation: your ears aren’t broken, and you weren’t imagining a balanced mix. CapCut’s real-time preview engine is optimized for smooth scrubbing, not for bit-perfect audio rendering.
3. Auto-normalization is quietly doing its own thing
CapCut has a built-in loudness normalization feature that balances volume and removes peaks automatically so that dialogue, background music, and effects stay in perfect harmony. Great in theory — but if it’s toggled on (or off) without your knowledge, it can interact with your manual volume settings in ways that surprise you at export time. That’s why every audio guide worth reading tells you to check for auto-normalization in CapCut’s audio settings if your export still sounds louder or quieter than expected, since disabling this gives you more direct control over the final output level.
4. The platform you upload to re-processes your audio again
Even a perfectly balanced export can sound off once it hits social media, because the platform itself normalizes loudness on upload:
| Platform | Normalization target | Practical effect |
|---|---|---|
| TikTok | ~-14 LUFS | Loud background music gets compressed down, which can make the overall mix sound squashed |
| YouTube Shorts | Similar to TikTok | The 15–20% range for voiceover content produces consistent results |
| Instagram Reels | Similar to TikTok | Treat it the same way and test playback in-app after uploading |
The upshot: export and watch the actual upload before posting, because normalization behavior can shift perceived loudness in ways that the CapCut preview does not always reflect. A test export you review only inside CapCut’s own player isn’t the final word — the uploaded version is.
Step-by-Step Fix
Step 1 — Lower the clip volume to a sane starting point
This is your baseline, not your finish line.
| Content type | Suggested background music volume |
|---|---|
| Voiceover / dialogue-heavy video | 10–25% |
| Music-only / aesthetic / mood reel | 50–80% (midpoint ~60–70%) |
Rule of thumb: if someone is talking, the music should support the voice, not compete with it. If no one is talking, the music can drive the emotion.
On mobile: Tap the audio clip → tap Audio → drag the Volume slider down to your target range.
On desktop: Select the clip → open the Audio panel on the right side → adjust the volume slider there.
If your music still sounds too loud even at 20%, that’s usually a sign the source file itself is mastered hot — the source audio file is likely mastered at a high loudness level, which is common with commercial and trending music. In that case, try lowering the slider to 10–15%, and if it still sounds overpowering, consider normalizing the audio file before importing it into CapCut. A hot source file can also cause crackling and distortion at export — covered in the CapCut audio crackling fix if you’re hitting both problems at once., or use a quieter version of the track. Hollyland
Step 2 — Don’t set one flat volume for the whole video
A flat volume level rarely works well across an entire video. Instead, duck the music down under your voice and let it breathe during the quiet moments:
- Fade in / fade out: Tap the audio clip and drag the fade handles at either end. A short fade-in (0.5–1 second) prevents the music from punching in abruptly against your opening words.
- Keyframe volume automation: Tap the clip → select the keyframe (diamond) tool → add volume keyframes where your voiceover starts and ends, lowering the volume during speech segments and raising it back during b-roll or transitions. This is a manual version of the “audio ducking” you hear in professional podcasts and YouTube videos.
Step 3 — Turn off (or intentionally use) loudness normalization
Go to the Audio tab and check whether Normalize loudness is enabled. If your export is coming out inconsistently loud, disable it and set levels manually instead — this gives you predictable, repeatable results instead of letting the algorithm guess. If you’d rather lean on it, enable it deliberately and use it as your final pass rather than fighting it with manual keyframes at the same time; running both aggressively can cause pumping or unnatural dips.
Step 4 — Check for a muted or zeroed master channel
This one’s sneaky. Clip volume and master volume are separate. Restoring a clip’s volume does not override a muted master channel, so check both. If you’ve already turned your music down (or up) and the export still doesn’t match, scroll through your keyframes — if you added keyframes to automate volume, one may be anchored at zero, so tap the clip, select Audio, then Keyframe, and scrub through to find any dips.
Step 5 — Preview on real hardware before you trust it
Preview the clip with headphones before making any final decisions — headphones reveal balance issues that phone speakers can mask. Then do a second pass on your phone’s built-in speaker, since that’s how a large chunk of your audience will actually watch. Two different playback systems will expose two different sets of problems.
Step 6 — Export, then actually re-watch the exported file (not just the CapCut preview)
Because the in-app preview isn’t guaranteed to match the render, treat your first export as a test pass. Play the actual MP4 file outside of CapCut — in your phone’s gallery app, VLC, or QuickTime — before you upload anywhere. If the exported file sounds right but looks soft or compressed, your video export settings may also need adjusting — see the guide on best CapCut export settings for bitrate and codec recommendations. If it matches what you intended, you’re done. If not, you’ve isolated the problem to CapCut’s rendering rather than the platform’s compression, which tells you exactly where to keep adjusting.
Quick Volume Planner
Use this little calculator to get a starting slider percentage based on your content type and how “hot” your source music file already is. It won’t replace your ears, but it’ll save you the trial-and-error loop.
🎚️ CapCut Background Music Starting Point
Understanding Loudness Targets (LUFS, RMS, and Peak — Explained Simply)
If you want to go beyond “drag the slider and hope,” it helps to understand the actual measurement units audio engineers use:
- RMS (Root Mean Square): measures the standard loudness of an audio signal over time, offering a more accurate representation of perceived loudness than peak levels. CapCut
- LUFS (Loudness Units Full Scale): a measurement unit used to quantify loudness levels, guaranteeing consistency throughout different audio platforms and helping maintain a balanced audio experience.
- Peak levels: measure the degree to which the audio waveform is at its highest point — important to prevent distortion, but loudness normalization focuses on general perceived loudness instead.
For reference targets: the recommended loudness should be around -16 LUFS for spoken word content and -14 LUFS for music. Most social platforms normalize incoming uploads to somewhere near -14 LUFS, which is exactly why a music-heavy export that measures much louder than that gets aggressively compressed on upload — and why your once-balanced mix can suddenly sound “squashed.”
If you want to pre-normalize your music file before bringing it into CapCut, a tool like Audacity works well: click on the Loudness normalization feature in the upper right section of the interface and turn it on to normalize your audio to the target loudness of -23 LUFS as a broadcast-style baseline, then adjust from there for your platform.
Common Mistakes That Make This Worse
- Fighting normalization with manual keyframes at the same time. Pick one primary method and use the other lightly, or you’ll get pumping/unnatural volume swings.
- Judging the mix on laptop speakers only. Laptop and phone speakers roll off bass and compress dynamics differently than headphones — always check both.
- Assuming the CapCut preview is final. As covered above, it’s a real-time approximation, especially on CapCut Web, which uses cloud-assisted rendering rather than pixel/audio-perfect playback.
- Not checking the master channel. A muted or dropped master track can undo careful clip-level mixing entirely.
- Uploading straight from the CapCut export without a listen-through. The platform’s own normalization is the last mile — always sanity-check the actual uploaded post.
FAQ
Q: Why does my music sound fine in CapCut but too loud on TikTok/Instagram?
TikTok, Instagram Reels, and YouTube Shorts all apply their own loudness normalization after upload, targeting roughly -14 LUFS. If your exported file is significantly louder than that on the music track, the platform’s compression can make the mix sound squashed or unbalanced compared to how it played inside CapCut.
Q: I already lowered the volume slider — why is it still loud after export?
Check three things in order: (1) whether a volume keyframe is anchored higher than you think, (2) whether the master channel is separate from the clip you adjusted, and (3) whether loudness normalization is toggled on and interacting with your manual settings.
Q: Does CapCut’s “Normalize loudness” feature permanently change my original file?
No — it doesn’t permanently alter your original audio file; it only applies adjustments within the project timeline, allowing you to tweak, undo, or export your edits without affecting the source file. CapCut
Q: What’s the fastest reliable workflow to avoid this issue next time?
Set your starting volume by content type (10–25% for voiceover, 50–80% for music-only), add fade handles and keyframe ducking under speech, disable auto-normalization while you dial it in manually, export a test file, and listen to that exported file — not just the in-app preview — on headphones and phone speakers before you upload.