CapCut stuttering mid-edit is a fixable problem. This guide walks through the likely causes and how to clear them.
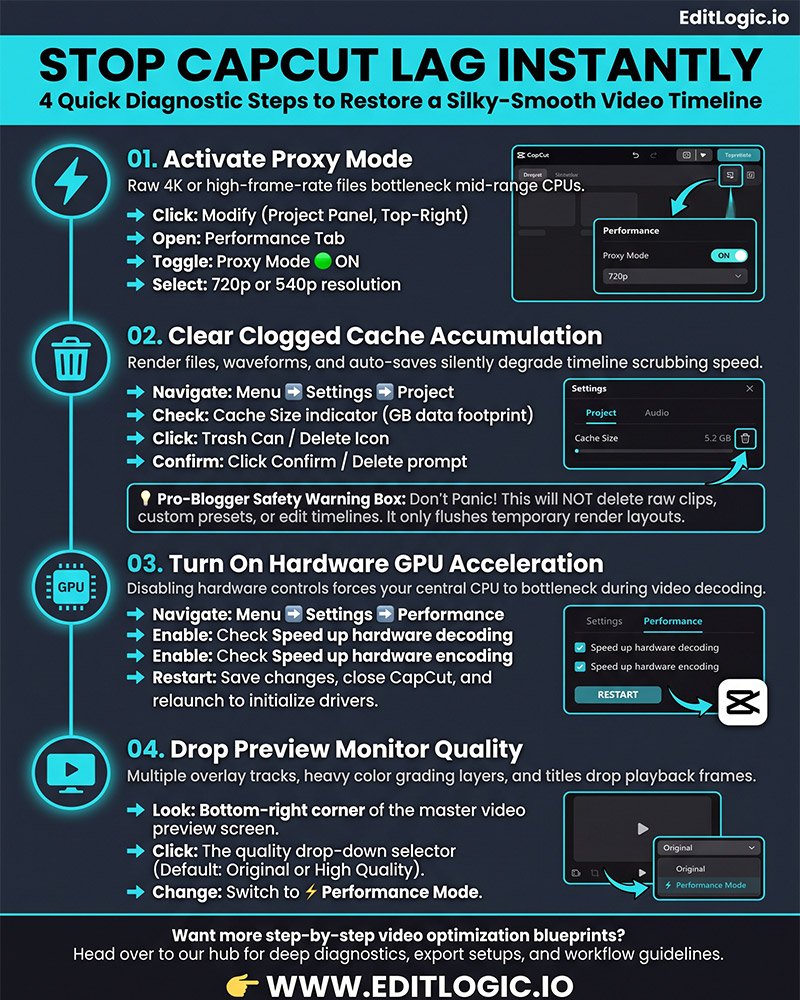
Step 1: Activate Proxy Mode (The Instant Fix)
Any mid-range computer setup will be bottleneck when editing raw 4K and high frame rate video, because of the quality of the raw video files. However, CapCut gets rid of this with the help of the Proxy option, which helps to make lightweight copies of the files for editing while swapping back to the original files during export.
- Navigate to the top-right corner and click Modify under the Project details panel.
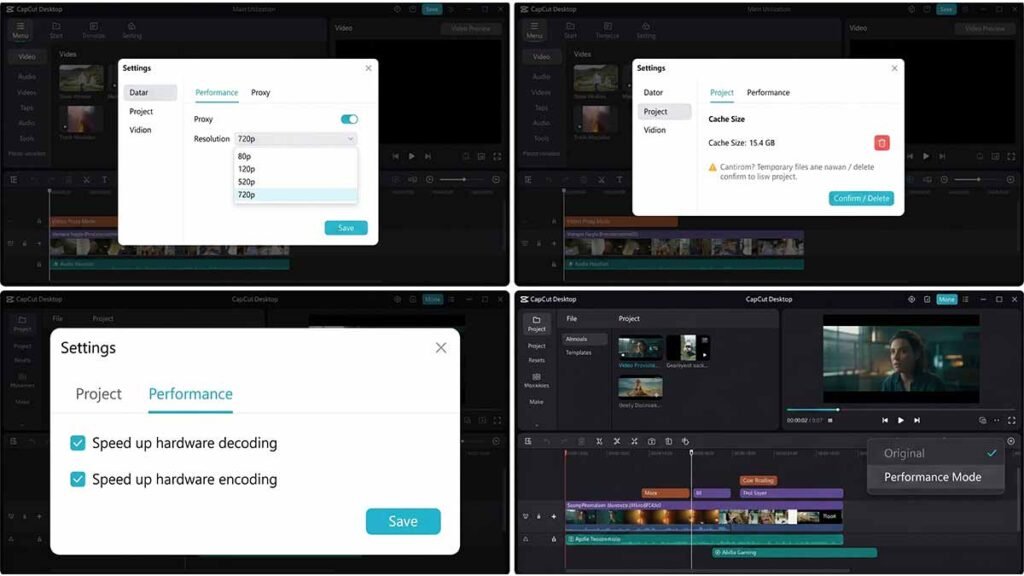
- Switch to the Performance tab in the settings pop-up box.
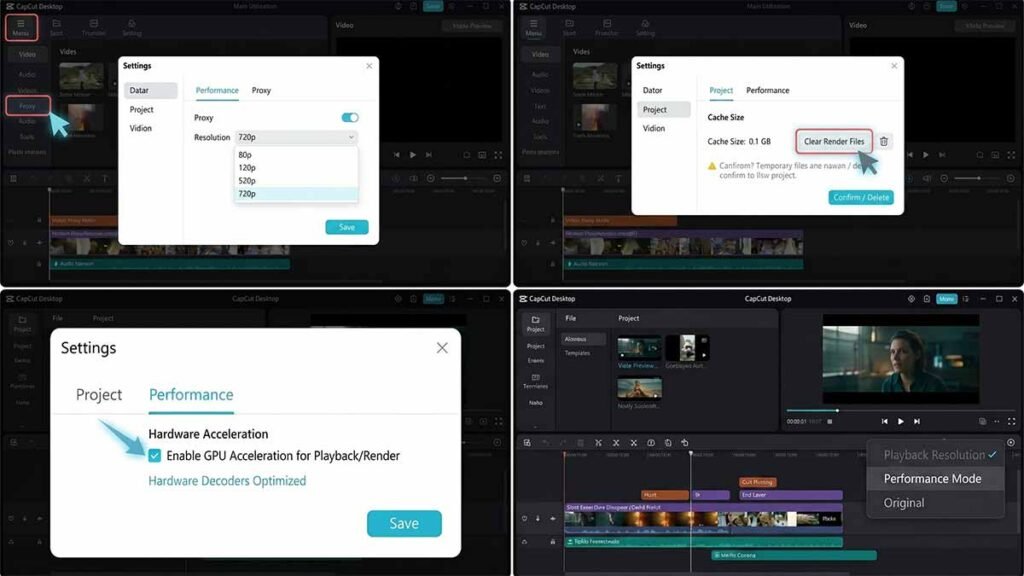
- Toggle the Proxy option to ON.
- Select either 720p or 540p as your proxy resolution.
- Click Save. Your timeline will instantly feel lighter as CapCut processes the smaller proxy clips.
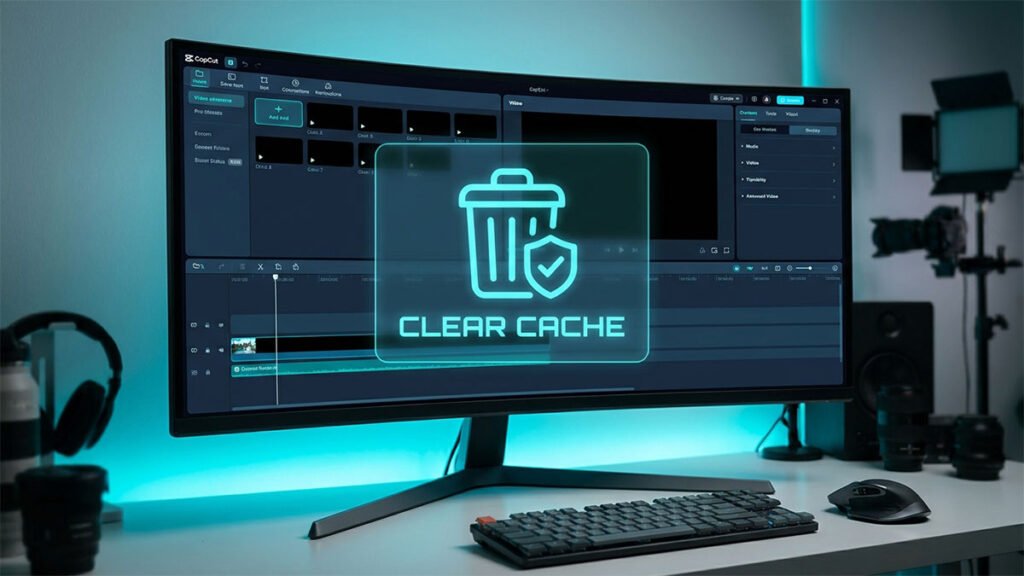
Step 2: Clear the CapCut Cache File Accumulation
When you use the software over time, the system storage gets clogged with cached render files, waveform data and auto-saves. Without flushing these files, the performance of the timeline is noticeable degraded.
- In the top-left main menu, go to Menu > Settings > Project.
- Look for the Cache Size indicator showing how many gigabytes are being held.
- Click the Trash Can / Delete Icon next to the cache size data.
Select Confirm / Delete in the warning prompt.
Important Note: This will not delete your video projects, media clips, or edit history. It only deletes temporary layout pre-render files that CapCut can easily recreate if needed.
Step 3: Turn On Hardware GPU Acceleration
To smooth out the video decoding and encoding, CapCut must rely on your computer’s graphics processing unit (GPU). If this is disabled, full performance loss will occur in your CPU.
- Go to Menu > Settings > Performance.
- Check the box for Speed up hardware decoding.
- Check the box for Speed up hardware encoding.
- Click Save, close CapCut entirely, and relaunch the application to force the system to initialize the GPU drivers.
Before configuring your GPU acceleration parameters, follow the standard workflow to safely clear your CapCut cache without losing projects to flush out heavy temporary background data.
Step 4: Drop the Timeline Playback Preview Resolution
To adjust the play speed of the Timeline Playback Preview, go to the Play Speed option. When editing heavy technical layouts with multiple overlay tracks, color grading layers and text elements, lowering of the live playback monitor quality stops frame drops.
- Take a closer look at the lower right corner of your main Video Preview Player.
- In the quality, click the drop-down menu (set to Original or High Quality).
- Change the preview performance option to Performance Mode.
Performance Optimization Summary
| Fix Action | What It Does | Performance Impact |
|---|---|---|
| Proxy Mode | Swaps raw media for lower-res temporary files | High timeline speed boost |
| Clear Cache | Erases temporary project clutter | Clears system bottlenecks |
| GPU Acceleration | Shifts processing from CPU to Graphics Card | Major rendering boost |
| Performance Playback | Lowers monitor quality during active playback | Stops dropped frames |